
Follow these 8 simple steps to ensure your new bin number sticker is perfectly aligned and stays securely in place for years to come.
🛠️ What You Need:
- Soap and water (or cleaning spray)
- A dry cloth
- Masking tape
- A plastic squeegee or a credit card
📋 Step-by-Step Instructions
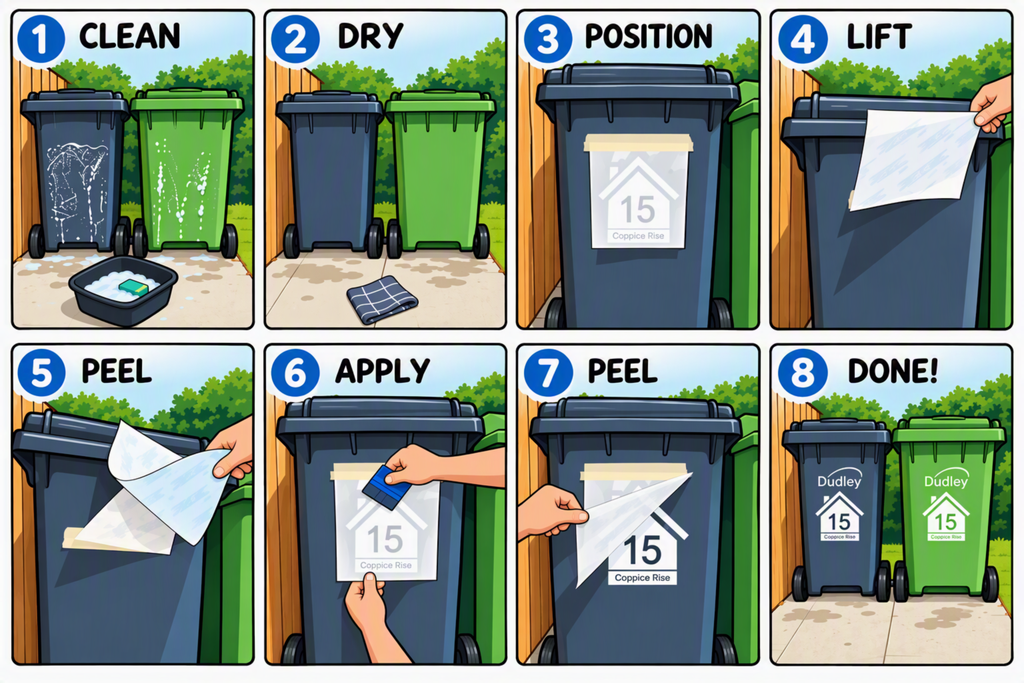
🧼 Step 1: Clean
- Wash the area of the bin where you intend to place the sticker to remove any dirt, dust, or grease.
🧻Step 2: Dry
- Dry the surface completely with a clean towel. The adhesive needs a bone-dry surface to stick properly.
📍 Step 3: Position
- Place a strip of masking tape along the top edge of the sticker. Move the sticker around on your bin until you are completely happy with its alignment and position.
📜Step 4: Lift
- Press the masking tape firmly onto the bin, lift the sticker upwards using the tape as a temporary hinge.
📄 Step 5: Peel
- Using the masking tape hinge, carefully peel the thick backing paper away from the application tape, leaving the vinyl design stuck to the application tape.
💳 Step 6: Apply
- Flip the sticker back down, keeping the sticky vinyl lifted slightly away from the bin surface at an angle so it doesn’t stick prematurely.
- Starting from the top, use a squeegee or credit card to firmly push the sticker down onto the bin.
- Work your way smoothly from the top down until the entire sticker is attached.
📄Step 7: Peel
- Peel the application tape away slowly starting from one of the corners, pulling it flat and backward against itself.
- Ensure the vinyl design stays stuck firmly to the bin as you peel.
✨Sep 8: Done!
- All done! Your wheelie bin is now easily identifiable.